
Creating a custom address list under GAL
Scenario
When you set up your Microsoft 365 account, you were given the option to create a custom address list. This is an essential tool that can help you organize your contacts in a more efficient way. You can use this list to group related contacts together (for example, work contacts and personal contacts), or to keep track of pending tasks.
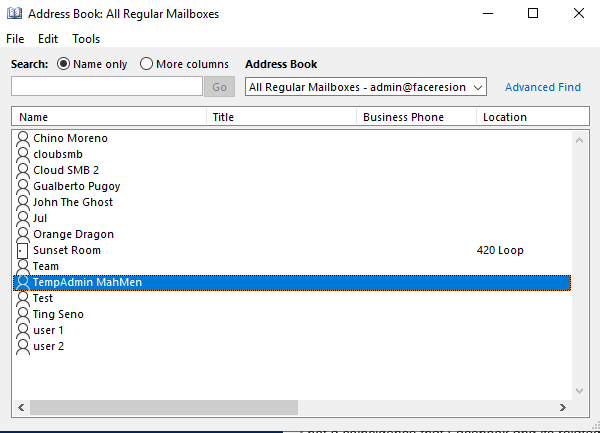
Outlook GAL’s
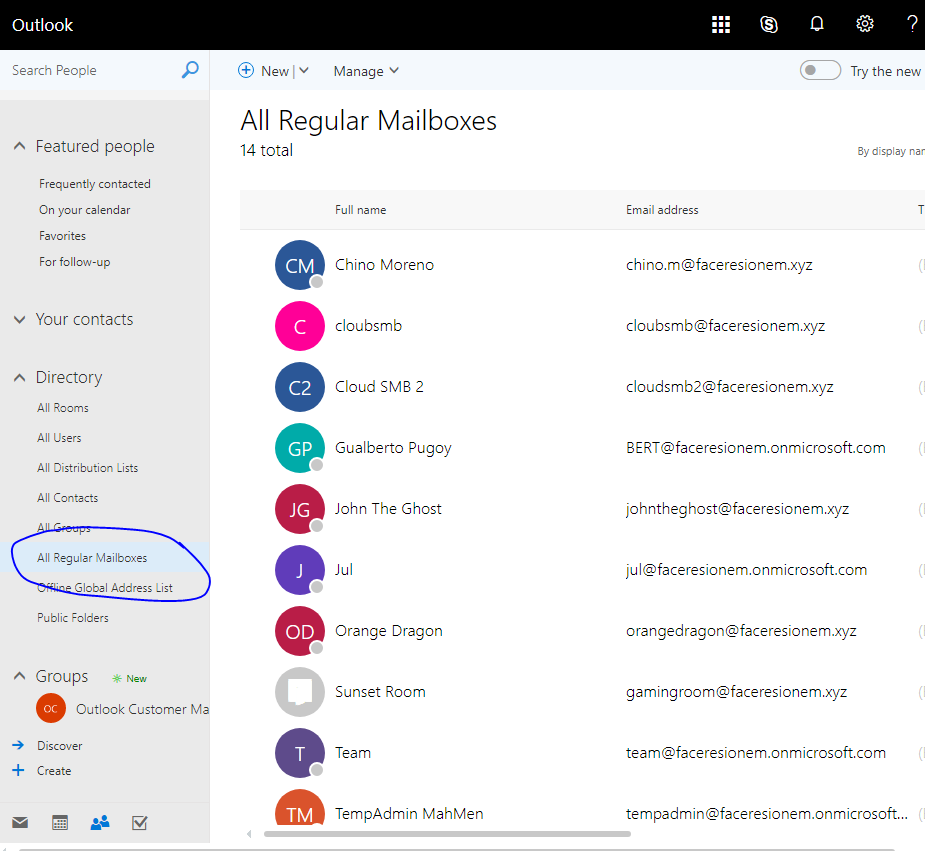
OWA GAL’s
Steps
1. Setup Organization Management role with ‘Address list’ permission
To do this just setup Exchange Administrator role or better yet a Global Administrator role for your user account.
2. Connect to Exchange Online via PowerShell
3. Execute identical cmdlets below against your preferrence
Name: Name of the Address List RecipientType: Types of mailbox you want to filter. Please see variety below.
MailUniversalDistributionGroup UserMailbox MailContact MailUniversalSecurityGroup DiscoveryMailbox SharedMailbox DynamicDistributionGroup MailUser EquipmentMailbox PublicFolder RoomMailbox RoomList
Sample to filter all regular mailbox
New-AddressList -Name 'All Regular Mailboxes' -RecipientFilter {(RecipientType -eq 'UserMailbox')}
Sample to filter all mail contacts (gmail, outlook.com, etc.)
New-AddressList -Name 'All Outside Contacts' -RecipientFilter {(RecipientType -eq 'MailContact')}
4. Sync changes from the user side
The street word for this is “Tickle” which is to basically sync the the affiliation attribute we just created
# for mailbox objects
Get-Recipient -Filter {RecipientTypeDetails -eq 'UserMailbox' -and Company -eq 'Corp'} | Set-Mailbox -applymandatoryproperties  $null

Get-Recipient -Filter {RecipientTypeDetails -eq 'UserMailbox' -and Company -eq 'Corp'} | Set-Mailbox -Simp
leDisplayName $null

# for mail objects
Get-Recipient -Filter {RecipientTypeDetails -eq 'MailContact' -and Company -eq 'Corp'} | Set-MailUser -Simp
leDisplayName $null