Share mailbox folder with specific people in your organization
Scenario
How do I share a specific folder in my Microsoft 365 Exchange online mailbox with another user?
Sharing files and folders is an important part of collaboration. You can use the sharing features in your Microsoft 365 Exchange online mailbox to make it easy for other users to access and work with the files and folders that are important to them.
If you want to share a specific folder in your Microsoft 365 Exchange online mailbox with another user, you need to create a sharing policy. A sharing policy defines the permissions that are given to users who want to access or work with the file or folder. Creating a sharing policy is an easy way to ensure that everyone who needs access to the folder has the appropriate permissions.
Steps
In this article, we will show you how to share a folder in a Microsoft 365 Exchange online mailbox using PowerShell. We will also discuss some key considerations when using this feature for each scope.
Sharing a mail folder
In this example,
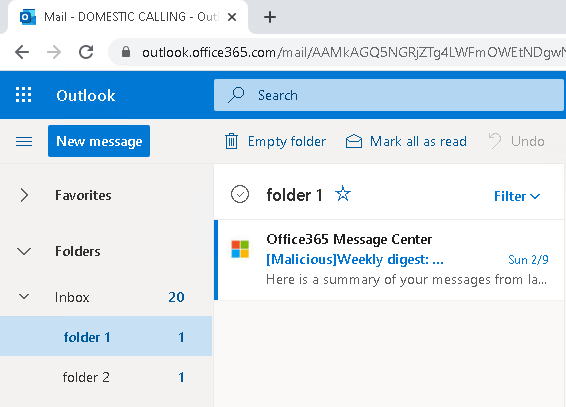
“Domestic” want to share only three specific folders(Inbox, folder 1 and folder 2) in his mailbox in READ only mode to “Inbound”.
Sharing the specific folder
-
Access Outlook on the web (OWA) of the source. This can be done in Outlook (OLK) but it’s best to do it in OWA to avoid any cached conflicts.
-
Right click the root folder which in this case is Folder and add Inbound with the appropriate permission
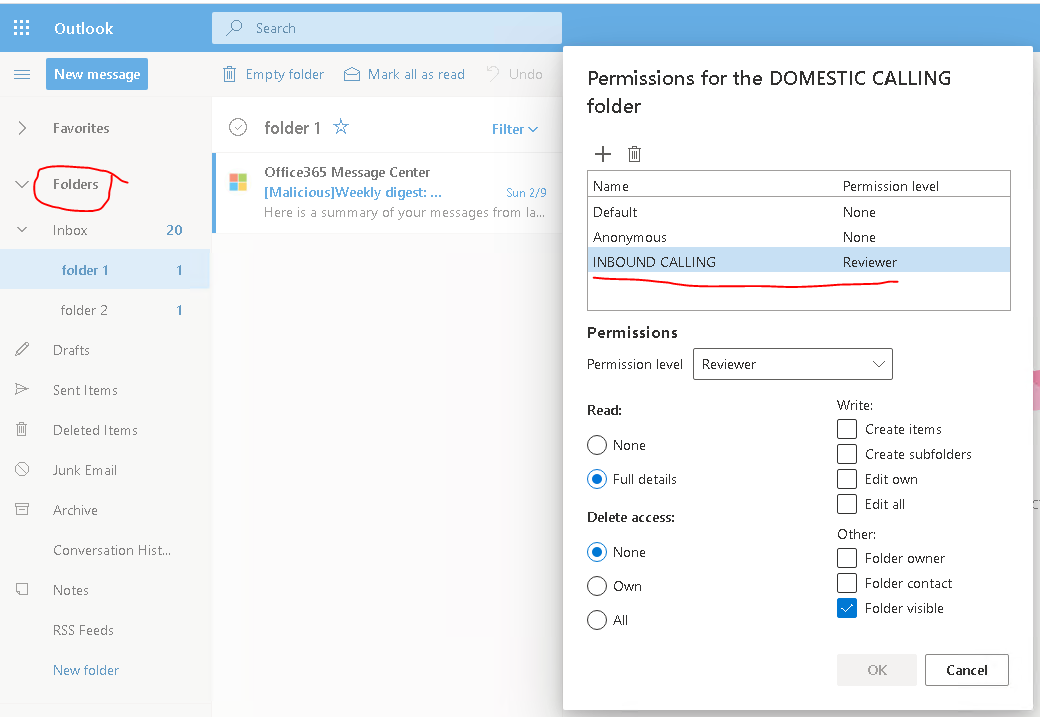
It is important to add permission to the root folder for the desired results, regardless of your target folders.
“Sharing a folder does not automatically share any subfolders. To share a subfolder, the primary folder must be shared first, and then you can set sharing permissions for a subfolder.” - MS Support
-
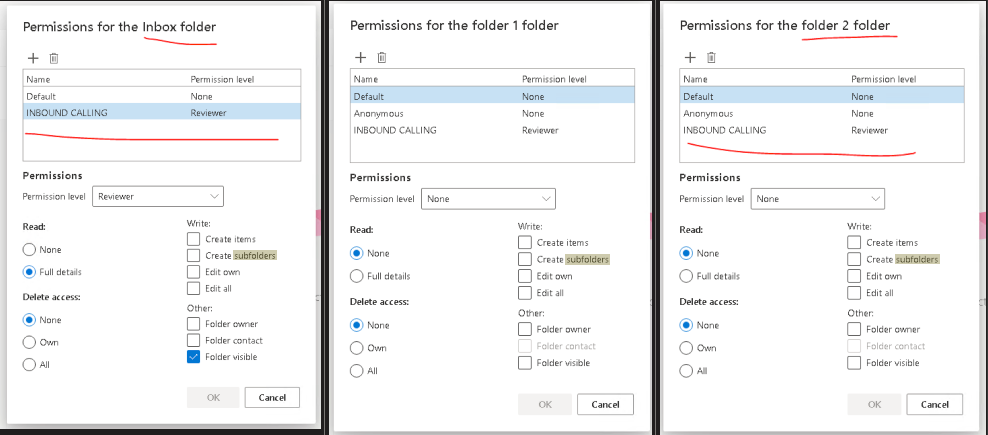
Perform step 3 for the rest of the desired folder and it should look like below.
-
Optional step. Access the source mailbox calendar, set the permission of the People in my organization to not shared to achieve what is desired. Also customize if needed.
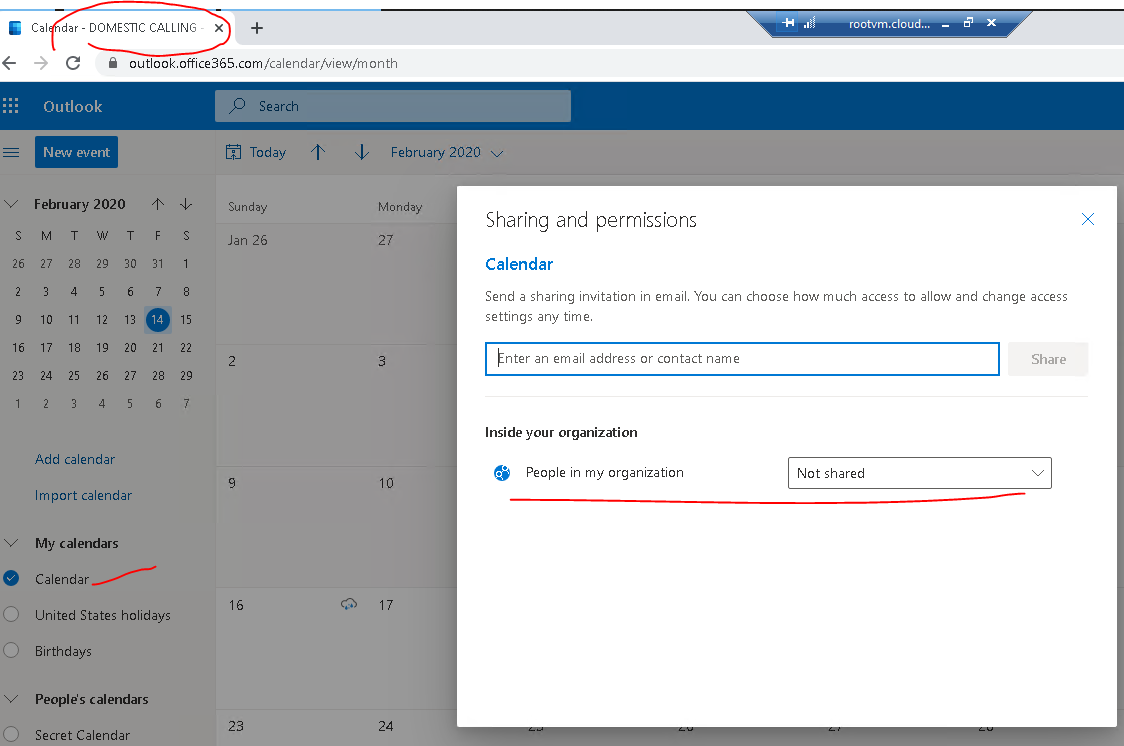
It is also important to take note that, By default, your primary calendar is shared to the entire organization. - MS Support
-
Once done, allow 10 minutes for sync delay to complete.
Opening specific folder
Since this is not a full blown type of delegations (AKA full-access mailbox permissions) Outlook Autodiscover will not enable automapping for the shared folders thus, it needs to be added manually.
Outlook on the web
-
Sign in to your account in Outlook Web App.
-
Right-click your primary mailbox in the left navigation pane, and then choose Add shared folder. (Your name is on your primary mailbox.)
-
In the Add shared folder dialog box, type the name or email address of someone who has shared a mailbox with you, and then select Add.
The shared mailbox displays in your Folder list in Outlook Web App. You can expand or collapse the shared mailbox folders as you can with your primary mailbox. You also can remove the shared mailbox from your Folder list. To remove it, right-click the shared mailbox, and then select Remove shared folder.
Outlook
-
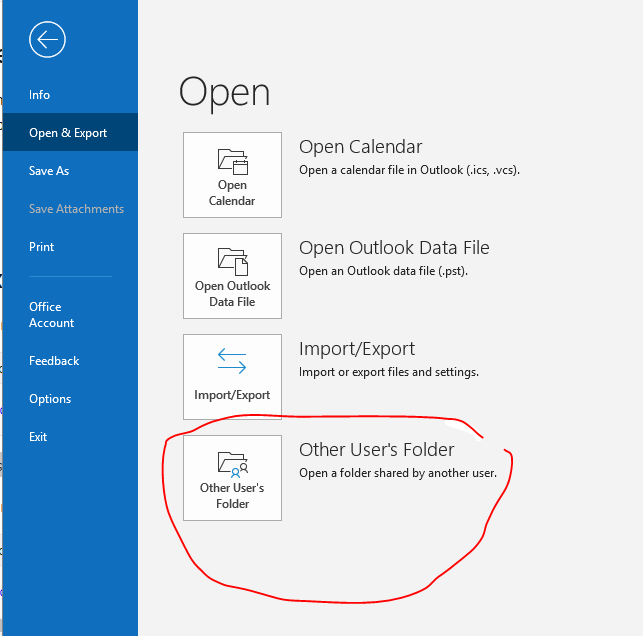
Launch Microsoft Outlook and then select the File tab.
-
Next, select the Account Settings button. A drop-down menu displays.
-
Select Account Settings… from the drop-down menu. The Account Settings screen displays.
-
Select the Change… button, located near the center of the Account Settings screen. The Change Account window displays.
-
Select the More Settings… button. The Microsoft Exchange window displays.
-
Select the Advanced tab.
-
On the Advanced tab, select the Add… button. The Add Mailbox window displays.
-
Enter the name of the organizational or resource account you want to view in Outlook in the Add mailbox: field, and then select the OK button. The organizational or resource account now appears below the folders list, located on the left side of the Outlook window.
Sharing a mail folder via PowerShell
Setup the mail folders permission
-
Customize cmdlets below and execute
#regular folder names
Add-MailboxFolderPermission -Identity [email protected]:\Marketing -User [email protected] -AccessRights Owner

#folder names with space
Add-MailboxFolderPermission -Identity [email protected]:\"Marketing Sales"  -User [email protected] -AccessRights Owner
This example grants the Owner role to Ed on the Marketing folder in Ayla’s mailbox.
Opening the mail folder
-
Launch Outlook desktop
-
Go to File tab
-
Navigate to Open & Export
Sharing a contacts folder
The default Contacts folder in Outlook is created in each Outlook profile. This folder can’t be renamed or deleted. You might have additional contact folders. You can share any of these folders by following this article.
-
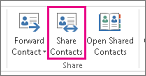
In People, in the folder pane, click the contact folder that you want to share with a person in your organization.
-
Click Home. Then, in the Share group, click Share Contacts.
-
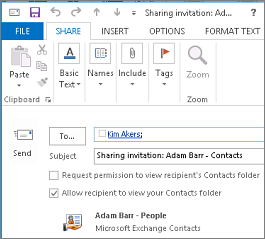
In the To box, enter the name of the recipient for the sharing invitation message. If you want to, you can change the Subject.
-
If you want to, request permission to view the recipient’s default People folder. To do so, select the Request permission to view recipient’s Contacts folder check box.
If you want to request access to a contacts folder other than the recipient’s default People folder, you must send an email message that asks for permissions to that particular folder. This option only requests access to the recipient’s default People folder.
-
In the message body, type any information that you want to include, and then click Send. Review the confirmation dialog box, and then if correct, click OK.
-
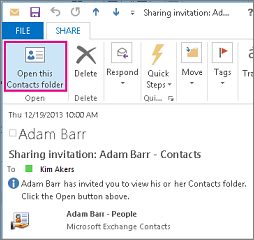
The person in your organization receives the sharing invitation in email, and clicks Open this Contacts folder.
Sharing a calendar folder
Sharing the folder
-
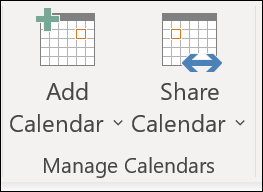
From your Calendar folder, on the Home menu, select Share Calendar.
-
Choose the calendar you want to share from the drop-down menu.
-
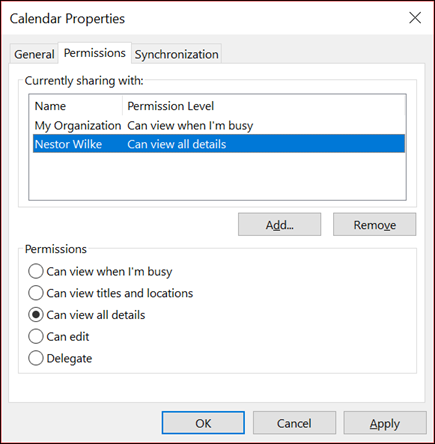
In the Calendar Properties dialog box, click Add.
-
You can search for people from your address book or type in their email addresses in the Add box. When you’re done adding names in the Add Users dialog box, click OK.
-
Back in the Calendar Properties dialog box, select the person’s name or email address, then choose the level of details that you want to share with the person, then click OK.
-
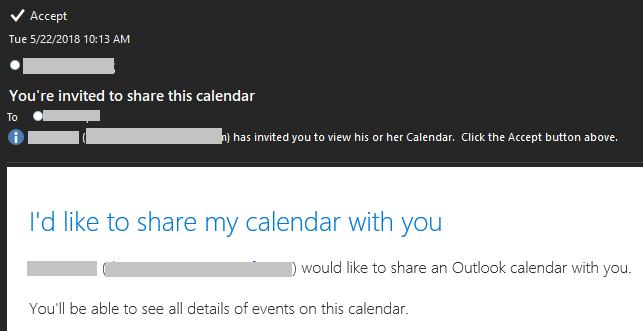
The person you’ve shared your calendar with will receive a sharing invitation by email.
-
Once the recipient clicks Accept, they’ll see your shared calendar in their calendar list.
Opening the folder
Applies to: Outlook 2016 (only for Office 365 users on Monthly Channel)
To open a shared calendar from the Outlook sharing invitation, click the Accept button in the sharing invitation. The shared calendar will be added to your Calendar pane under the Shared Calendars section.