Enable OMEv2 (AIP) using PowerShell script
Scenario
Are you looking to protect your M365 data from unauthorized access? If so, Office 365 Message Encryption (OME) provides an effective way of doing just that. OME is a powerful encryption mechanism that can be configured using Azure Information Protection. In this article, we’ll walk you through the steps needed to enble M365 encryption using PowerShell.
Message encryption is a security feature that helps protect your data from unauthorized access. By encrypting your M365 messages, you can ensure that only authorized users can view and access them. Office 365 Message Encryption offers several layers of security, providing protection from both malicious hackers and government investigators.
By following these steps, you will be able encrypt your M365 messages. This process is simple and can be completed in minutes.
Scenarios you’re possibly in:
- You want to encrypt messages from O365
- You want to enable Protect button in OWA
- You want to use IRM templates for emails
- Unable to open encrypted messages in EXO
Assumptions:
- Exchange Online and Azure Information Protection Licenses
- Activated Azure Rights Management
- Fully provisioned user(s)
- PowerShell 5 (latest version)
Steps
One-time machine configuration
1. Make sure Microsoft’s PackageManagement PowerShell Modules is configured on your machine.
2. Open PowerShell and execute the following cmdlets.
Install-Module MSOnline

Install-Module -Name AADRM

Update-Module -Name AADRM
Using a PowerShell script to enable OME v2
There’s a lot of configuration you can make using this script. However, in this section we will only describe the steps on how to enable OME v2 so that you can encrypt Office 365 message from Outlook or Outlook on the web.
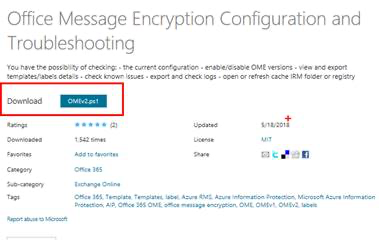
1. Download the script from Microsoft’s TechNet Gallery. If no longer found, you can copy the code from the author’s (MS Employee) GitHub repo and save it as [.ps1]
Start-OfficeMessageEncryption.ps1.
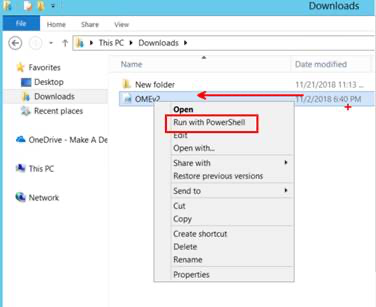
2. Run with PowerShell the ps1 file
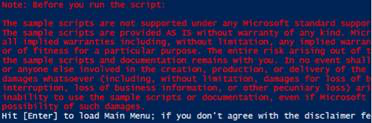
3. Press [Enter] to load the main menu and accept the disclaimer
4. Enter [1] and follow the prompts to connect to the needed online services using PowerShell
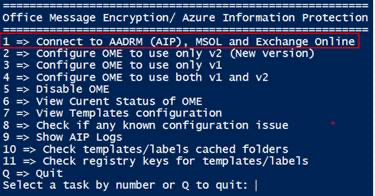
5. Go back to the main menu and enter [2] to automatically configure OMEv2
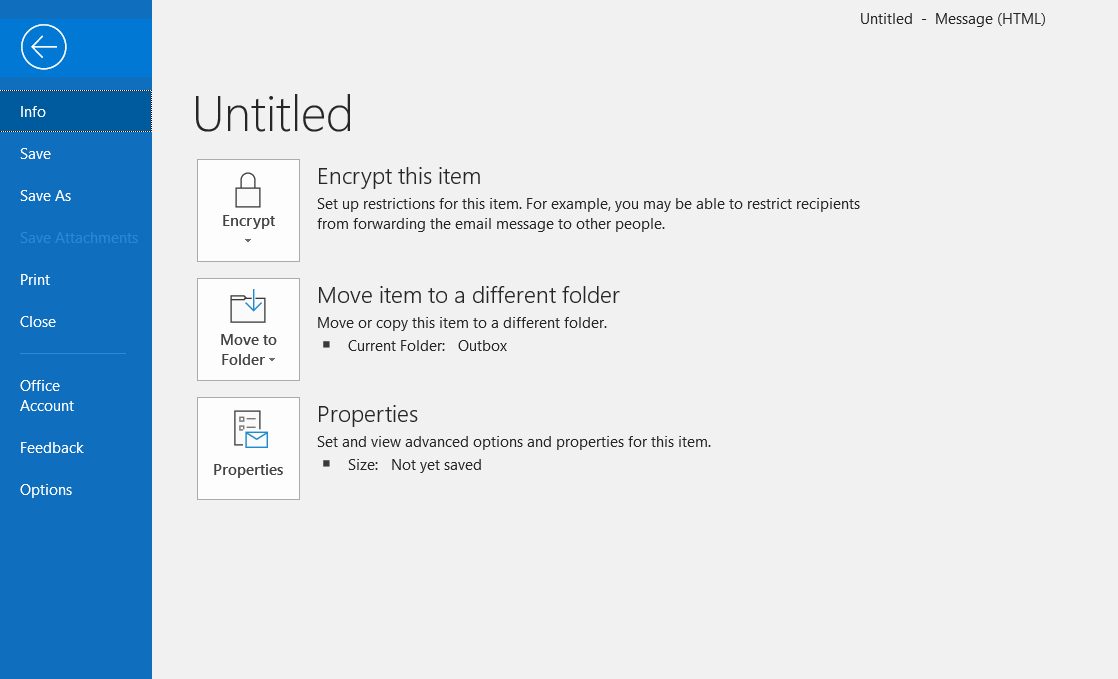
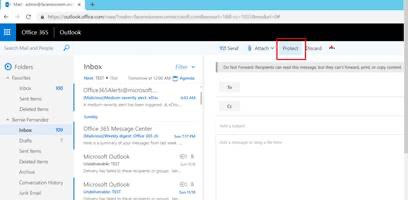
6. Check Outlook on the web (OWA) if you have the Protect button
That is it, you are all set to use encryption on your Office 365 messages.
Miscellaneous
1. You can use the tool for the following:
- View the current configuration
- enable/disable OME versions
- view and export templates/labels details
- check known issues
- export and check logs
- open or refresh cache IRM folder or registry
2. Protect button (IRM templates) will take time to appear on your Outlook Office 365 ProPlus
3. Encrypt Button is available Outlook Office 365 Business (Monthly Channel)